 Prompt: Binding
We are almost done! Our last prompt for this year is “Binding”. You’ve tried lots of new ideas this year in the making of your medallion quilt, so why not consider something different for your binding as well? This month’s prompt offers ideas for lots of different methods to make or enhance your binding.
When considering how to finish the outer edge of a quilt, one way to think about it is to consider how much attention you want to draw to that part of the quilt.
- You could have no visible binding by using a facing technique, so the quilt piecing goes all the way to the edge and seems to just stop
- You could have nearly invisible binding by color-matching the binding to the piecing.
- You could have visible binding that is generally a contrasting color, that frames the quilt all the way around, and this frame can be skinny, medium, or wide.
- Since bindings are often machine-stitched on one side, and then folded over, there are choices to how you attach that second side. It can be handstitched to be invisible, handstitched to be purposely visible, machine stitched to be invisible, or machine stitched to be purposely visible.
- And as you’re choosing the binding width, you can attach to the back and fold to the front, or attach to the front and fold to the back, creating different effects of where the widest part of your binding shows up.
- You could have binding that is also something extra special by itself with special treatments on the fabric, or extra texture or dimension or a flange or something that adds to the wow factor there. Or you could be binding around a non-rectangular shape that has the binding show off scallops or wiggly edges.
Methods/tutorials to help you finish your quilt in these different ways are explained more below.
 Faced bindings. Modern quilts look particularly beautiful with faced edges (no visible binding). There are many different ways to achieve this look. Some of my favorite tutorials are: https://www.cottonandbourbon.com/tutorials/quilt-facing-tutorial blunt corners (Audrey Esarey)
https://opquilt.com/2013/08/05/faced-binding-tutorial/ mitered corners (Elizabeth Eastman)
http://weallsew.com/make-quilt-facing/ triangle corners (Robbi Joy Eklow)
Color matched/color change bindings. It’s definitely a spicier option, but some quilts may just yearn for a color matched binding, so that the binding isn’t an obvious design element. The opposite of this is a color change binding that is a deliberate design element- same technique, different intention). Debbie Jeske did a nice tutorial on color matched bindings: https://aquilterstable.blogspot.com/2012/06/about-that-binding.html , as did Sylvia Schaefer on Fresh Quilting: https://www.youtube.com/watch?v=B3vEGcvXaeQ . Joyce Geizler’s approach (changing colors at the corners of the quilt) could work well with your medallion quilt, particularly if you have used a log cabin style construction and have different colors on the different edges of your quilt: https://www.youtube.com/watch?v=hnbc8DcW8m4
Standard mitered corner binding. This is the classic and is probably what most of us started with when we did our first binding. It can match the quilt or be a contrasting color and can vary in width, depending on your preference. It can be hand finished or machine finished. I like Karen Brown’s tutorials for standard bindings. Here is her basic tutorial, which describes hand stitching for an invisible finish on the back side of the binding https://www.youtube.com/watch?v=jma6XJzPS18&list=RDCMUCQt_y4kqMQlG1id0n975DVg&index=1 and here is her tutorial on 3 different ways to apply and finish a binding completely by machine: https://www.youtube.com/watch?v=EDf1uVfQaTE Extra fun (but extra work) is to use a visible big stitch hand stitch to fasten the binding down on either the front or back of your quilt: https://www.loandbeholdstitchery.com/blogs/lo-and-behold/how-to-hand-quilt-your-binding
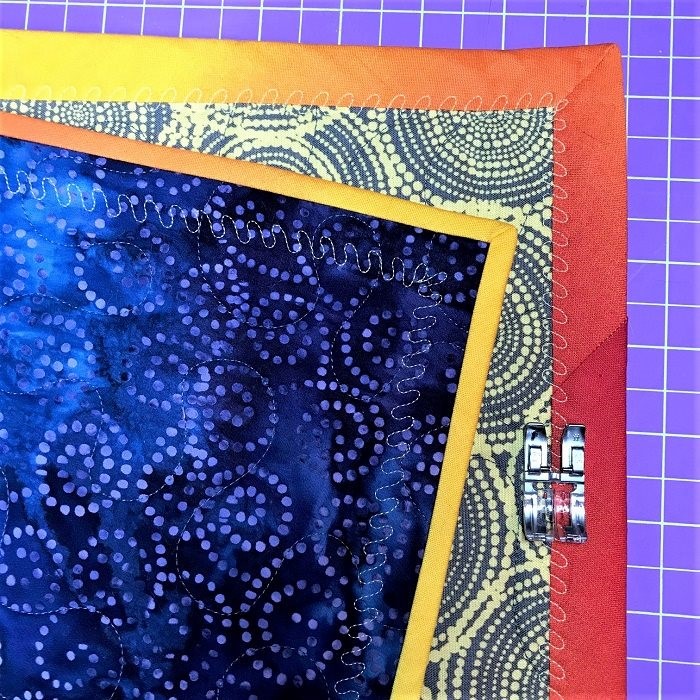 By special request, I’m including directions for the way our member @snarkynarwhal does her “foldover” standard bindings. They are typically narrow on the front and wide on the back and are completely finished by machine. She starts with a 3” wide strip of fabric, folded in half along the entire length, making a 1 ½” wide piece. The binding is stitched to the front side of the quilt with a ¼” seam, then folded around to the back, like a standard binding. It is then machine stitched on the 2nd side, but a little farther away, using a wide decorative stitch like a honeycomb or blanket stitch or wiggle to catch the edge. This kind of binding is especially easy to finish because that wiggly wide decorative stitch is very forgiving, in addition to looking cool. It can also be done in reverse (stitch to the back of the quilt first, then fold to the front) if you want the wide part to be on the front of the quilt.
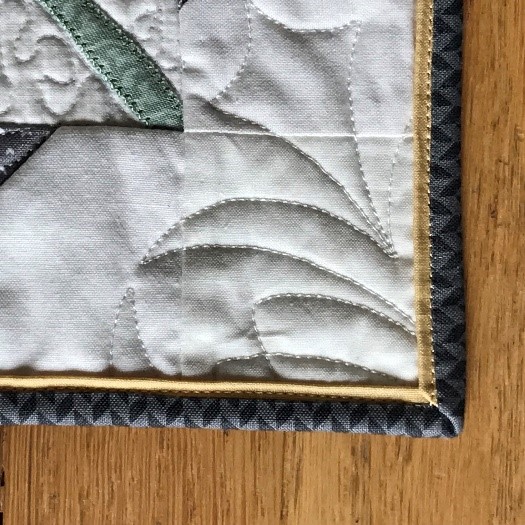 Faux Flange binding: I love faux flange bindings. They are an easy way to add a fine line of color at the edge of your quilt. Sometimes it is just what you need to give some “wow” factor. Bonuses- with this method, the mitered corners almost match themselves, plus it is completely done by machine. My favorite tutorial for this method is: https://sewfreshquilts.blogspot.com/2015/01/flanged-binding-tutorial.html
Wide Bindings. Wide bindings can add an additional design element to your quilt. I’ve had good luck using a wide bias binding as demonstrated by Carrie Nelson of Moda Fabrics https://blog.fatquartershop.com/carrie-nelson-explains-wide-binding/ . Since it is cut on the bias, it has the advantage of being able to round the corners of your quilt if you wish. If you are binding a quilt with bias binding, it is much easier and more efficient to make a long continuous bias strip. This is my go-to tutorial for that method- https://www.youtube.com/watch?v=P91GqWO7CGA You can also use a standard double fold binding cut on the straight of the grain, but made wider than normal (aka “chunky” binding). Latifah Saafir has a nice tutorial for this: https://www.youtube.com/watch?v=lea_zNEXu5s
Extra Fancy/embellished bindings. There are lots of ways you can create texture or draw attention to the outer edge of your quilt. What about using prairie points (folded fabric triangles), inside or outside the quilt edge? Here’s a tutorial for classic prairie points https://www.youtube.com/watch?v=sIHjSgxlKH0 and another for a quick way to create a chain of points https://www.youtube.com/watch?v=LULOyPepTm0 .
You could also do something similar with small finished half circles, or yo-yos. One of the things on my bucket list is to someday make a scalloped edge on one of my quilts. A smaller, wall medallion quilt might be a good candidate for that. This tutorial (http://www.abrightcorner.com/2020/10/scalloped-quilt-border-tutorial.html ) uses a specialized ruler, but you could easily follow her directions and make a template for your customized scallops. And, here is a way to use freezer paper to design a scalloped or wavy border: https://stashbandit.net/how-to-make-a-scalloped-quilt-border/ .
You can also embellish with buttons, beads, or embroidery: https://www.quiltingdaily.com/quilt-binding-options-bespoke-edges/
Another idea is to do some decorative stitching on the binding fabric before you even cut it. This idea comes from Geta Grama https://www.getasquiltingstudio.com/2018/04/a-special-binding.html . She did some simple parallel lines stitched on her binding fabric before cutting and wow, what a look!
Last, but not least, if you’ve made a wall quilt, don’t forget to make a hanging sleeve! My go-to tutorial for sleeves is from Jacquie Gering : http://tallgrassprairiestudio.blogspot.com/2012/02/hang-your-quilt-hanging-sleeve-tutorial.html . If your quilt is small enough, you might be able to use the corners on a faced binding (using the triangle corners method) to hold a rod for hanging.
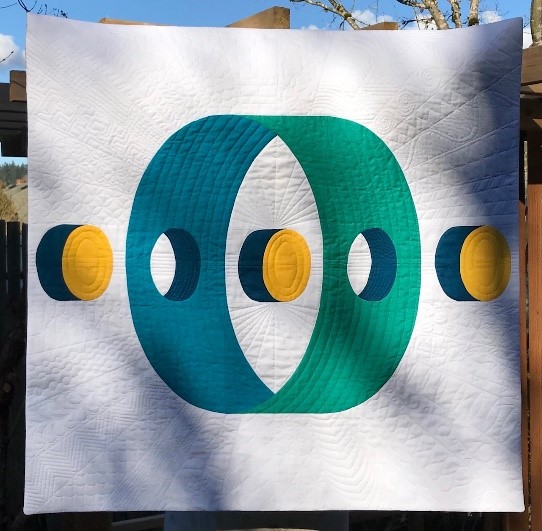
Have fun choosing your binding method and completing your Salsa Medallion!
November Summary- Binding
|
MILD
|
MEDIUM
|
SPICY
|
|
Your usual method
|
Faux Flange Binding
|
Prairie Points or other embellishments
|
|
Standard binding with mitered or rounded corners
|
Wide Bias Binding
|
Color Matched or Color Change binding
|
|
Faced Binding
|
Embellish your binding fabric with stitching before cutting into strips
|
Big Stitch Hand Stitched Binding
|
|
Fold over binding with decorative machine stitching to secure
|
|
|
Please tag your work in progress and your completed quilt: #seamqgsalsaBOM
