
This is the eighth installment in the 2020 Seattle Modern Quilt Guild BOM project! Your guides on this journey are Susan Pray (IG: @sushi.farmer) and Kathy McGinnis (IG: @a_swede_life).
Make this fun quilt design unique with your own fabric selections. It’s not too late to start, join us! All the instructions posted so far are available on our website here.
Creating the Mountain Blocks
Hello Cascadia Cabin Peeps,
This month we will be creating our mountain blocks in the upper center of the quilt. They’re fairly straightforward in construction using your reserved sky fabric from earlier this year and your mountain fabric. We will be using a simple and gentle improv technique which yields unique-looking peaks. You might recognize that this month’s block is similar to the more structured, traditional quilt pattern, Delectable Mountains. Here’s a little history of the design in case you are interested.
Your own personal mountain range will look unlike anyone else’s. What could be better? If you wish, you could make your fabric strips any width that pleases you as long as your block ends up the correct finished size to fit into the rest of the quilt top. You could cut 1.5” strips instead of 2.5”, you’d just need 12 of them to create the 12.5” (unfinished) width of the block, or a combination of 1.5” and 2.5” strips. Dealers choice! That’s what this “pattern” is all about. Make it your own.
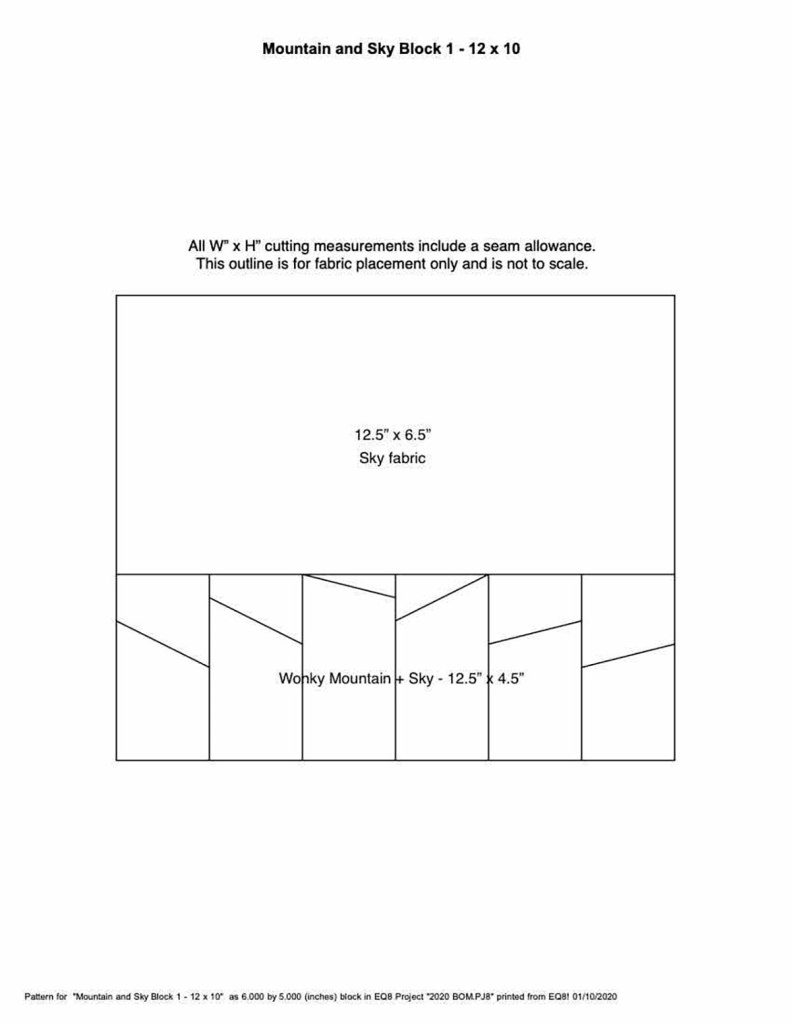
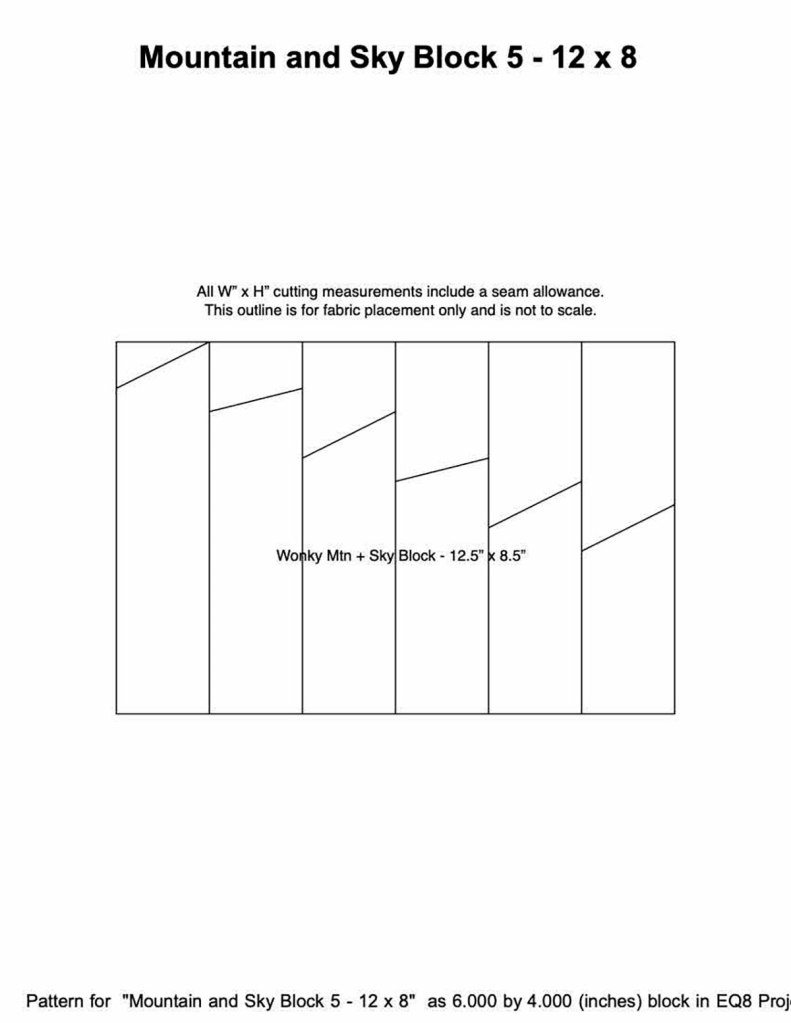
You will create 5 blocks this month. Blocks one and two finish at 12” x 10”, the remaining three finish at 12” x 8”. We will not be sewing the whole mountain range together until we finish our Foothills blocks next month. At that point you can join your finished sky section and your finished forest sections to the reserved mountain/foothills section. Nearly done!
This month’s fabric requirements are approximate: ½ yard of sky fabric, ½ yard of mountain fabrics. It is suggested that you cut the strips as you need them, since everyone will be using a different amount of fabrics based on the length and angle of the cuts you choose to make as you go. Everyone will need the two larger pieces of sky fabric for blocks one and two.
Sky fabric cuts:
- Qty 1 – 12.5” x 6.5”
- Qty 1 – 12.5” x 4.5”
- Qty (unknown) – 2.5” WOF
Mountain fabric cuts:
Begin by laying a mountain strip right side up, then layer a sky fabric strip also right side up overlapping enough to make a diagonal cut through both to create your angle for the mountain range peak. Don’t try to cut anything to the correct length first. Your angles can be sharp or gradual, depending on how rugged you want your mountains to look. If you want an improv look, be sure to vary the angles from strip to strip. For each strip cut the angle, then sew, then trim to the correct length. Refer to the individual diagram of each block to see the direction of the angle and approximate length you’re looking for so you know about what length of strips you’ll need to start with.
Cut the angle and direction of the cut you’d like to see for the peak through both pieces of fabric.

Make the cuts straight so the seam is easy to sew. A ruler helps unless you’ve a very steady freehand.
Place your two fabrics RST with the corners offset as shown below; this creates “ears” and marks the ¼” seamline.

Then sew a ¼” seam at the valley created between the strip and the ear. This will result in a strip section with nice straight sides.

After the sky is sewn to the mountain strip cut it to length (refer to the individual block diagrams) and use the scraps from your first completed strip to continue making peaks until you run out, then cut another set of strips of each fabric and carry on.
For instance, in block number 1 all the strip sets will be 4.5” tall but the length of the mountain and sky fabrics will change depending on the strip’s placement in the block.
Sew your strips together to form a rectangle, then add the top rectangle section of fabric in blocks 1, 2, & 3. Blocks 4 and 5 don’t have top pieces; they’re made up of strip sets only.
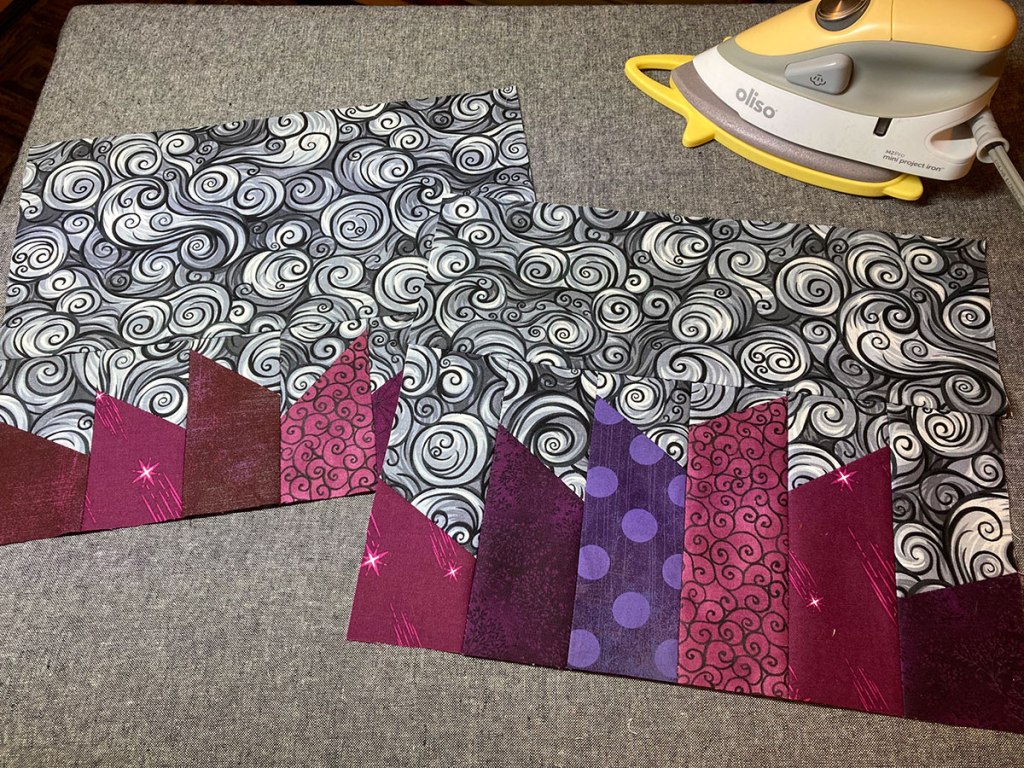
This month’s example uses a single sky fabric and a scrappy collection of mountain fabrics.

Mountain blocks 1 and 2 completed:


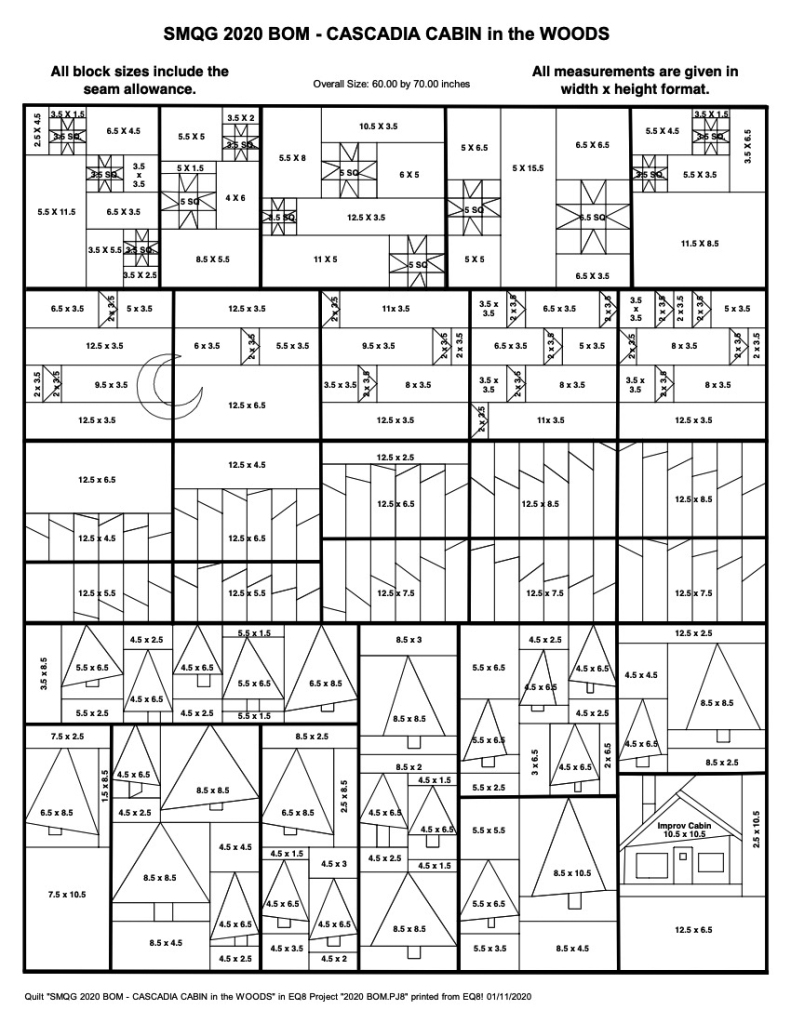
Here’s the full quilt layout again, in case you need to reference it:
Next month we will be creating the Foothills range of blocks using mountain and forest fabrics using the exact same technique.
Pinterest Board: https://www.pinterest.com/quiltguild/medallion-quilt-inspiration/
Basic Seminole Patchwork by Cheryl Greider Bradkin, 1990
Liberated Quiltmaking II by Gwen Marston, 2010
Modern Blocks: 99 Quilt Blocks from Your Favorite Designers, complied by Suzanne Woods, 2011
Modern Plus Sign Quilts by Cheryl Brickey and Paige Alexander, 2018
Simply Seminole by Dorothy Hanisko, 1997
Please be social!
Don’t forget to tag your progress pictures on Instagram! Use the hashtags #cascadiacabinquilt or #smqgbom2020 to share your BOM progress.
Also continue to use the hashtags #seamqg #seattlemqg #showusyourmqg and #seattlemqgsewathome to share the wonderful quilts you’re creating.
